Showing posts with label DIY. Show all posts

Monday, July 27, 2026

Rage Against the Room

From the article on TLT
Embrace all the feelings and channel teen angst with a DIY Rage Room! Cindy Shutts welcomes Faith Healy onto the Teen Librarian Toolbox blog to lay out a program plan along with feedback on how each station was received.

According to Healy the idea came up "while having a conversation with a co-worker, Sol Perez,  about mental health, we were brainstorming ways to do a program that would help teens as well as get them to want to come. We struggled to find an idea that would balance education with fun enough that teens would actually come.  Randomly she threw out a rage room and we both looked at each other and said that is it."

Read the full article here.

Seems like a great way to utilize supplies many of us have lingering in our work areas and let teens relieve some stress! I could see this type of program going over really well during or after finals. What do you think? Would you offer a Rage Room at your Library or have you already? How'd it go?

[Cindy Crushes Programming: How to turn a conversation about Mental Health into a fun program aka How to do a Teen Rage Room. Shutts, Cindy. Teen Librarian Toolbox blog. July 2, 2026. https://teenlibrariantoolbox.com/2026/07/02/cindy-crushes-programming-how-to-turn-a-conversation-about-mental-health-into-a-fun-program-aka-how-to-do-a-teen-rage-room/]

Wednesday, June 18, 2025

DIY Stickers

Looking for a low-cost, fun, maker-y activity for teens (and tweens)?  Try DIY stickers! All it takes is parchment paper, unlined paper, coloring tools, and scissors. In her most recent post on Teen Librarian Toolbox, Karen Jensen (with an assist from her own teen) details the process. 

She writes, "Like a lot of teens today, my teen is obsessed with stickers. She also loves to spend her free time coloring. Thus, she started making her own hand-colored stickers in a very low-tech way. She saw people making their own on social media and adapted the process in a way that works for her. Today she’s walking us through the steps."

This is a back pocket activity I have out for a lot of teen and tween events. I keep a container with the supplies, a few image suggestions, and the instructions ready to go in the teen space. It's worked pretty well and can be adapted to a lot of different programs. I've used it during Anime Club, Minecraft and Five Nights at Freddy's events, Teen Hangouts, and many more. It's also an easy craft to take to school visits. This summer is a perfect time to give it a try! Color Our World by coloring your own stickers!

The teens/tweens we have mainly draw their own images or trace from their phones as described in Jensen's post. However, it's a good idea to have a few suggestions if they aren't artistically inclined or don't have a device.  The suggestions I use are from Canva's free image library (it is a Pro account through our Friends group). 

I've included my instruction sheet and an example suggestion sheet below. Happy stickering!


Instructions


Suggestion sheet


Stop here to read Karen's full post. [Teen Makerspace: DIY Color Your Own Stickers, Low Tech. Karen Jensen. Teen Librarian Toolbox blog. June 17, 2025.]


Thursday, January 16, 2025

Mini-Book Shelf Making Program for Teens

Image - Cindy Shutts

Ever wonder what to do with all those Altoid mints tins you and other library staff have been collecting? Well, your wait is over. Cindy Schutts who writes the "Cindy Crushes Programming" column over at SLJ's Teen Librarian Toolbox has the answer. She created a DIY program for teens that helps them create tiny bookshelves inside each box.

Read on to find out what you need and how to prep for this fun and crafty program for teens. [Cindy Crushes Programming: Mini Bookshelves. Shutts, Cindy. Teen Librarian Toolbox blog. School Library Journal. January 1, 2025.]

Tuesday, December 11, 2018

DIY Ugly Sweaters

Oodles of holiday baubles and craft supplies hanging around?  You are already well on your way to hosting your very own DIY Ugly Sweater program!
In fact, let's be honest, you're pretty much there, save for set up, tear down, and advertising--and maybe some sweet holiday tune-age to keep the party vibe alive.
This program is really fun and ridiculously easy!  I provided tons of craft supplies and holiday doo-dads (think tinsel, bells, bows, ribbons, and glittery ornaments) and let everyone go crazy!
                             
                             
While the participants were encouraged to bring their own article of clothing to decorate, I did have a few sweaters on hand, in case folks forgot.  (Thanks, Goodwill!)  
 
Beyond that, it was mostly encouraging silliness and being available to help operate the hot glue gun, if anyone needed assistance.
Easy peasy and a definite hit with the kids?  Check and check.  

Tuesday, August 14, 2018

Happy Trees! Paint Like Bob (Ross)


Image result for bob ross

Have you been yearning to try a Paint Night for your patrons, but can't afford the cost?  Maybe you have an avid group of artists always looking for a new challenge?  You should host a Bob Ross Painting Party!

For those of you unaware of the calming majesty of Bob Ross, his Emmy-Award-winning Joy of Painting program--aired on public television in its heyday, but now also available on Netflix, Youtube, and in DVD format--is one of the most popular and recognizable art programs on television.

For our first go, we decided to pick the Bob Ross video tutorial "Grey Winter" - - only three paint colors were necessary and most of the brushes were readily available through our craft suppliers of choice.  We had 20 of each brush available, but depending on your budget, you can always add or subtract (and have folks share.)  We decided against buying the painter's knives and instead encouraged participants to use the back end of their smaller brushes or popsicle sticks for the portions of video that called for that particular technique.

For canvases, we ordered these handy-dandy 9x12 boards from Nasco.  At $1.20/each, we knew we'd be hard-pressed to find a better bang for our buck.  We also purchased our three acrylic paint colors from Nasco and had more than enough for two separate sessions of Bob Ross goodness.

On the day of the program, we set up our room and dispersed the necessary materials, giving each participant a paper plate to use for their paint palette.  Each station also had a book display stand to serve as an easel.  NOTE: Make sure to cover the base of your book stand with masking tape or the like, as they're likely to be painted upon!


Before beginning, reassure folks that everyone's art will look different--and that's ok!  Rather than focusing on the finished product, they should instead enjoy the process and exploration. 


While each Bob Ross tutorial is around 30 minutes, plan for at least 60-90 minutes for your program, as you'll like want to pause the video after each step.  This allows folks to catch up without feeling like they need to create at professional-artist-speed, as well as gives them the opportunity to replenish any supplies, review a previous step, or simply take a break.

Other supplies that will come in handy:

  • paper towel (lots!)
  • individual cups of water

We had a blast with this program and definitely plan to revisit Bob and his happy, happy trees in the future.


Wednesday, August 8, 2018

It's a Tech Take-Apart, a Break-a Take-Apart...

(First things first...sorry to all you 90's folks for the earworm in the title. 😉)

Do you have oodles of old technology sitting around, waiting to be recycled?  Why not put them to good use--before they're recycled...and put to good use--and host a Tech Take-Apart?

A Tech Take-Apart is literally just that: patrons get the chance to take technology/technology-based toys apart to see what's inside and find out how they work.


This program can be as structured or free-form as you like, depending on your expertise, comfort-level, and/or prep time.  At the most basic level, you provide your participants with goggles, technology, and tools and let them loose on your available outdated technology.  Be sure to also pull out books or print materials that explain the inner workings of your available tech!  Folks will be curious to learn, so be ready!

To expand upon the idea, you could also consider reaching out to a local technician or handyman who may be able to provide insight on the various pieces found in the disassembled equipment.  (You could even make this a series of programs, focusing on a different type of machine each session!)


My library's recent Tech Take-Apart was hit with patrons of all ages--it was so fantastic watching some of the younger kids help an older woman with her endeavors, explaining the various bits and pieces to her as she disassembled her computer of choice--and garnered attention from both regular patrons and folks who have never been in our library before this particular program.


A few things to consider before hosting a Tech Take-Apart of your own:

1. Even if you ask patrons to bring their own screwdrivers and you have a small stockpile of your own, bring more.  You can either buy relatively inexpensive ones or simply ask staff members if you might be able to borrow theirs for the duration of the program.  Out of the multiple families who attended, only three of them remembered to bring a screwdriver along.  **TIP: Provide screwdrivers of varying sizes.  The wee ones for eyeglass repair and the like came in quite handy for many a participant.**

2. Be sure the technology you're providing is suitable for disassembly.  Remove any battery packs, snag SIM cards, clear and/or remove hard drives, and so forth.  Additionally, avoid any CRT (cathode ray tube) television screens or computer monitors.  The contents are extremely volatile.  (Needless to say, kids with tools cracking them open?  Bad News Bears.)

3. Provide goggles for your participants.  While most folks are quite careful, even the most diligent tech lover could accidentally send a computer key flying through the air during the break-apart of your take-apart.

4. Depending on where you hold the program, consider having some sort of table covering handy.  Indentations on tables are less than optimal, let's be honest, and technology can be awfully scratchy.

5. Have a plan in place for the various materials upon completion of your program.  Most of the technology will need to be recycled, so consider reaching out to either the recycling location or your local city/town government.  They may be willing to add your recycle-worthy technology to an already existing stockpile.  (The recycling location may charge a fee for drop-off and your community officials might have an agreement in place, allowing you to drop off your items at a more cost-efficient rate.)

Tuesday, July 3, 2018

Craft Stick Harmonica DIY

Super simple musical craft alert!

I just had a DIY Instruments program and the far-and-away winner was the Craft Stick Harmonica!  I used instructions found on the Housing a Forest blog.


It was simple, fun...and--chances are--you already have all the materials necessary on your craft shelves! 

Materials Needed:

  • craft sticks
  • paper
  • rubber bands or string
  • toothpicks
  • scissors

Each patron will need two craft sticks.  We used the wide ones, so I can't speak for the success of the skinnier ones.  Cut a piece of paper the same size as your craft sticks and sandwich the paper strip between the two.

Wrap a rubber band or some string around one end until it is snug.  Then, slide a toothpick--cut to the approximate width of the craft sticks--to the inside of the rubber band/string.  Repeat with an identical toothpick at the other end and wrap with a rubber band/string. 

And THAT'S IT.

Simply have the kiddos exhale or inhale to make a unique noise.  They can also try pinching the sticks together to see how the noises and vibrations change!  There was a bit of a learning curve, but once they figured out the technique, it was a symphony of buzzing and giggles.


Tuesday, June 26, 2018

Rockin' Crafts

Rocks rock.  Let's be frank. 

You can paint them, draw on them with Sharpies and/or crayons, or just use them as they are!  If you're planning a large program and need oodles of supplies, you can always buy bags of rocks from a hardware store or a garden center.  Otherwise, go on an adventure (take the kids on a nature walk, rock out a scavenger hunt, etc.) and gather your supplies!

What do you do with all these rocks once you have them?  I'm glad you asked!

How about Kindness Rocks?  Sprinkle kindness around like confetti!


Story Rocks (or Story Stones) are a super fun and easy activity that will encourage continued play and exploration!  Give the kiddos the stones, a simple prompt--for example: "Choose 5 stones and write a story that incorporates all of them."--and watch them go!


If you're looking for inspiration on additional ways to use your Story Rocks, simply Google and you shall receive what you seek in abundance.

Here's another fun option: Land Art!  


This can incorporate rocks, of course, but the possibilities are endless!  Check out this article found on The Artful Parent blog where they spoke with Richard Shilling, the author of the Land Art for Kids book series.

You can also create games!  Tic-Tac-Toe, Dominos, you name it!  Or perhaps a matching game is more your speed?  You could decorate stones--or have the patrons decorate stones--to create games to work on matching colors, upper and lowercase letters, numbers, and more!


Here's an adorable fish rock craft from the Hello, Wonderful website:


And another goodie from The Artful Parent: Making Faces with Rocks!


Tuesday, June 5, 2018

Rock Out Some Recreated Album Covers!

Looking for a fun, SRP-themed program for teens and tweens?  

How about having them recreate famous album covers?!
Image result for excited
Check out THIS super sweet blog post by The Lego Librarian for inspiration and then go forth and recreate it at your library!  Just be sure to follow the advice he gives: provide examples of approved album covers, both as a source of inspiration...and to avoid any awkward situations, as some album covers can be a bit...saucy.

What's really great about this idea is how it can be tweaked to best suit your needs/resources.  It could be a one-off program, a summer-long passive program--you could even offer it as a family challenge!

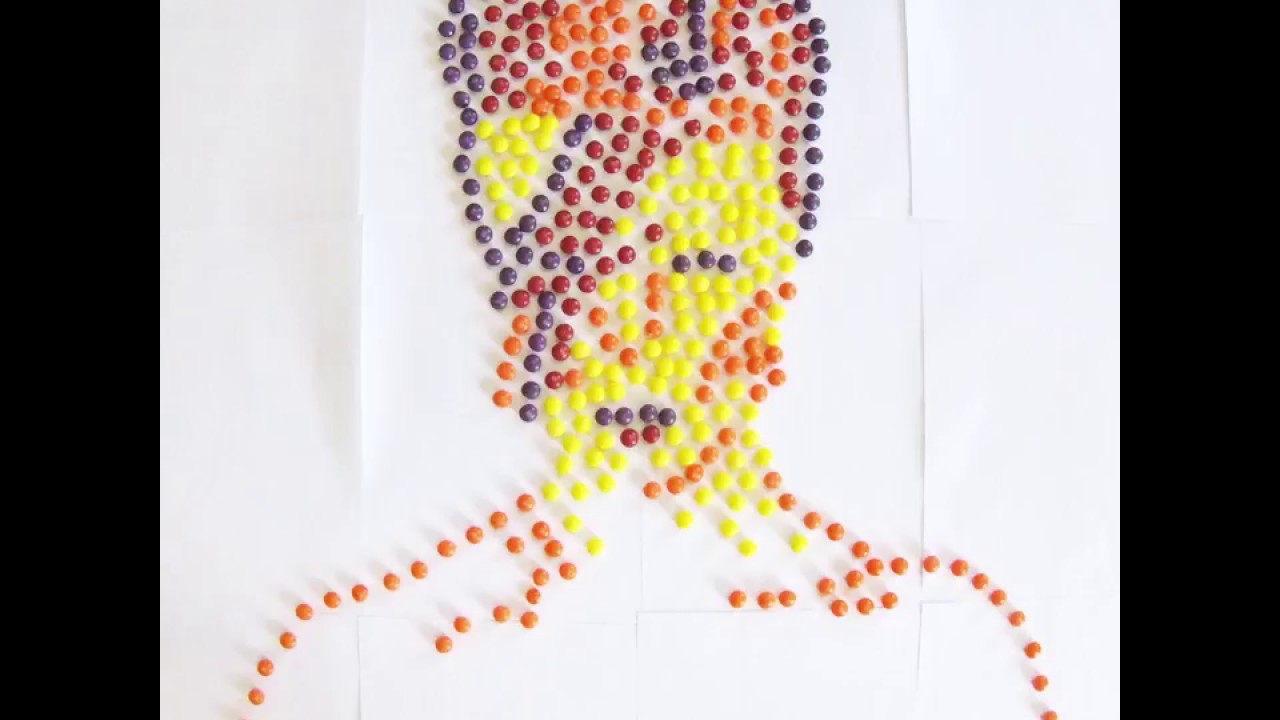
Another way to change it up?  Consider turning it into a craft!  Participants can recreate the covers using any number of materials, including LEGOs or candy! 

(Well, hello there, Skittle-d David Bowie!)
                                      Image result for skittles david bowie


Tuesday, May 8, 2018

Maker Projects for Every Budget? YES, PLEASE!

Looking for some inspiration on maker projects and supplies that fit into your library's budget?  Library Journal recently shared a download for their article Cheap Thrills (originally published in the November 2017 issue of School Library Journal, with oodles of fun ideas!)

Just can't get enough? 
Do you have a fever and the only prescription is more maker spaces?  
Then you'll definitely want to feast your peepers on this!

Make It @ Your Library is a rad website where you can search for maker ideas by price per person, age...even time needed to complete each project!

Tuesday, April 17, 2018

A Stylin' Community Partnership

One day, my husband shared an article he found on Reddit about a dad who taught other fathers how to style their daughters' hair.  

His comment: "I would love to learn how to do that."

I knew that I wasn't the most skilled at hair (embrace messy hair, for the win!) but I decided that this shouldn't stop me from trying to offer a class for our patrons!  I reached out to Clear Waters Salon and Day Spa, a local hair salon in Williams Bay, asking if they'd be interested in partnering for a hair how-to program.  Spoiler alert: they said yes.  

And How Do You 'Do was born.

We began marketing the program, both at the salon and in the library, making sure that both places were well-represented in the promotional materials and that our marketing campaign was universally used, both in person and on social media; we wanted folks to know right away what was going on and who was involved.


Next, we focused on what we'd need for the program itself.  It was decided that we would leave it open to anyone who wanted to attend, rather than making it exclusively for fathers/father figures.  In order to better plan, we asked for participants to register ahead of time, including both the parent and the child/children who would be in attendance.  Clear Waters was generous enough to donate both a handful of stylists and swag bags (those were a surprise!) for the event.  The library provided the space, the marketing materials, and additional essentials for the program: tables, chairs, manipulatives for the kids to use while they were helping with the tutorials, etc.


On the night of the program, the stylists came armed with a handful of ideas on what they could show, such as a basic French braid, the ever-popular Elsa braid, crowns, buns, and so forth.  The participants were also asked for specific style requests and were encouraged to record the sessions using their phones as they saw fit.

To add a bit of extra fun, one of the stylists also brought along some fun temporary hair colors for anyone who was interested. 
The kids loved heading home with rockin' mermaid/unicorn hair!


This program was so much fun!  Many of the patrons have requested we hold something like this again and, just recently, the salon expressed a similar wish - - so I certainly see more snazzy 'dos in our future.

One nice thing about this program is that it can be easily recreated, with or without the community partner, should you--or someone you know--be skilled at hair tutorials.  Phil Morgese and Emma, the father/daughter duo who inspired this whole idea, even have a Youtube series, if you'd rather do a video class!  Simply type in "dad hair school" on Youtube and voilà!  (Here's a link to a short video about the pair put together by 60 Second Docs)

Happy styling!